Chickpeas, also known as garbanzo beans, have been a staple food for centuries around the world, becoming a beloved ingredient in both traditional and modern cooking. They are also a powerhouse of nutrition. These vegetables are rich in vitamins, minerals, fiber, and protein. Chickpeas offer many nutritional benefits, which makes them a popular choice for health-conscious individuals. But before you uncover their culinary potential, you need to cook them properly. This guide delves deep into the world of chickpeas, exploring different ways of cooking, soaking techniques, and delicious ways to incorporate them into your meals.
Types of Chickpeas

Chickpeas come in various shapes, sizes, and colors, each offering its own unique taste and texture. Commonly found are two main types of chickpeas:
- Kabuli Chickpeas: Also known as white chickpeas, Kabuli chickpeas are larger in size and have a smooth, cream-colored exterior. They have a mild, nutty flavor and a soft, creamy texture, making them ideal for dishes like salads, hummus, and soups.
- Desi Chickpeas: Desi chickpeas, also referred to as Bengal or Kala chana, are smaller and darker in color compared to Kabuli chickpeas. They have a firmer texture and a slightly earthier flavor, making them well-suited for Indian dishes like curries, stews, and snacks like roasted chickpeas.
You can use both types of chickpeas interchangeably in cooking, depending on the desired dish. However, recipes typically prefer Kabuli chickpeas for their softer texture, while Desi chickpeas hold their shape better and are ideal for dishes requiring longer cooking times. Whether you’re making a hearty chickpea curry or a refreshing chickpea salad, choosing the right type of chickpeas can make all the difference in achieving the perfect taste and texture.
Why Soak Chickpeas?

Soaking chickpeas before cooking is an essential step that helps to soften the beans, reduce cooking time, and improve digestibility. Here’s why soaking chickpeas overnight is beneficial:
- Importance of Soaking: Soaking chickpeas in water overnight (for at least 8 hours) allows them to absorb moisture, which softens the beans and shortens their cooking time. This process also aids in the breakdown of some of the complex carbohydrates found in chickpeas, making them simpler to digest and less likely to cause digestive discomfort.
- Quick Soaking Method: If you’re short on time, you can use a quick soaking method to prepare chickpeas. Simply place the chickpeas in a pot, cover them with water, and bring to a boil. Let them boil for 2 minutes, then remove the pot from the heat, cover it, and let the chickpeas soak for 1 hour. After being soaked, the chickpeas should be drained and rinsed before being cooked.
- Removing Debris: Before soaking or cooking chickpeas, it’s essential to inspect them carefully and remove any debris, such as small stones or damaged beans. Rinse the chickpeas under cold water in a colander, discarding any beans that appear discolored, shriveled, or damaged.
Popular Methods of Cooking Chickpeas
Here are Two popular methods for cooking chickpeas once you’ve decided to soak them:
Cooking Chickpeas on the Stove

After soaking and preparing the chickpeas, you can cook them on the stove using the following method:
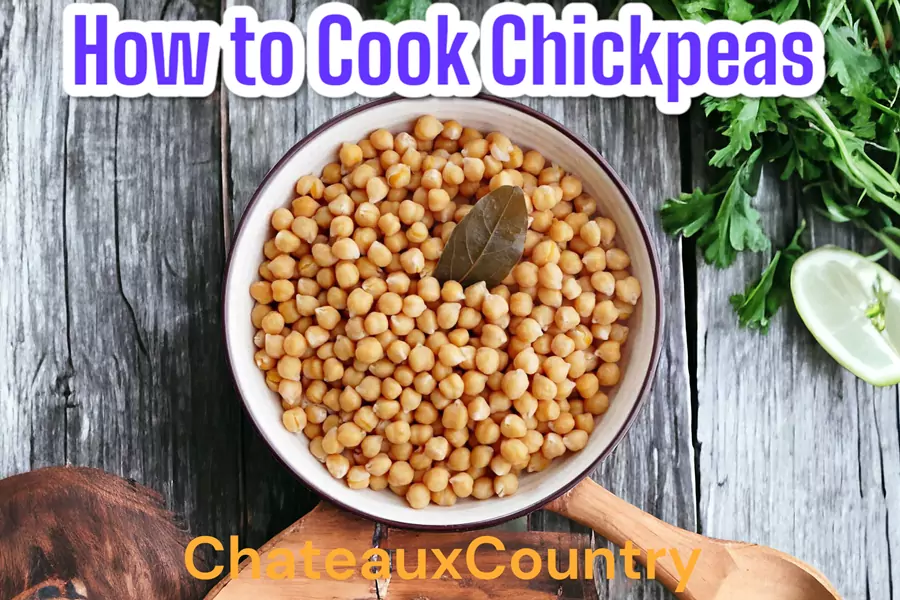
- Boiling Chickpeas: After soaking and draining the chickpeas, transfer them to a large saucepan and add freshly boiled water. Once the water has come to a boil over high heat, turn the heat down to medium-low and let the chickpeas simmer on low for a few minutes. During the cooking process, remove any foam that rises to the surface.
- Adding Aromatics and Seasonings: For added flavor, consider adding aromatics and seasonings to the pot while the chickpeas cook. Common additions include garlic cloves, bay leaves, onions, and spices like cumin, coriander, or turmeric. As they simmer, these ingredients infuse the chickpeas with a delicious flavor.
- Testing for Doneness: Chickpeas typically take about 1 to 1 1/2 hours to cook on the stove, depending on their size and freshness. To test for doneness, simply remove a chickpea from the pot, allow it to cool slightly, and taste it. The chickpea should be tender but still hold its shape. Continue simmering the chickpeas until you achieve the desired level of tenderness.
With these steps, you can easily prepare perfectly cooked chickpeas on the stove, ready to use in a variety of delicious dishes.
Cooking Chickpeas in a Pressure Cooker

Cooking chickpeas in a pressure cooker offers several benefits:
- Time Efficiency: Pressure cooking significantly reduces the cooking time compared to traditional stove-top methods. You can cook chickpeas in a fraction of the time, making them a convenient option for busy schedules.
- Energy Efficiency: Pressure cookers use less energy compared to conventional cooking methods, making them an eco-friendly choice for cooking chickpeas and other legumes.
- Retained Nutrients: A pressure cooker’s high-pressure environment helps the chickpeas retain more nutrients compared to boiling or simmering.
You have the option of using either the quick release or natural release method to depressurize a pressure cooker after cooking:
- Cooking Times: Chickpeas typically require around 10 to 15 minutes of cooking time under pressure. However, this may vary based on factors such as the size and age of the chickpeas.
- Pressure Settings: Most pressure cookers allow you to cook chickpeas at high pressure. Refer to the manufacturer’s instructions for specific pressure settings recommended for cooking legumes.
When using a pressure cooker, you have the option of using either the quick release or natural release method to depressurize the cooker after cooking:
- Quick Release: This method involves manually releasing the pressure from the cooker as soon as the cooking time is complete. It’s ideal for preventing overcooking and maintaining the texture of the chickpeas.
- Natural Release: This method allows the pressure cooker to naturally depressurize over time, typically for around 10 to 15 minutes. As the pressure decreases, natural release allows the chickpeas to continue cooking slightly, resulting in a softer texture.
Seasoning and Serving Chickpeas
Once the chickpeas are cooked, there are countless ways to season and serve them:
Seasoning:
To enhance the flavor of gram, you can cook it with a variety of spices, herbs, and sauces. Try seasoning with cumin, paprika, garlic powder, or fresh herbs like parsley, cilantro, or dill. You can also mix cooked chickpeas with a drop of olive oil and lemon juice for a simple yet delicious flavor boost.
Serving Suggestions:
You can incorporate cooked chickpeas into a wide range of dishes due to their incredibly versatile nature. Add them to salads for extra protein and fiber; use them in soups and stews for added texture and heartiness; or enjoy them as a tasty side dish alongside grilled meats or roasted vegetables.
Storing Leftover Chickpeas:
If you have leftover cooked chickpeas, store them in an airtight container in the refrigerator for up to 3 to 4 days. Alternatively, you can freeze cooked chickpeas for longer-term storage. Simply place them in a freezer-safe container or bag and freeze for up to three months. Thaw frozen chickpeas in the refrigerator overnight before using them in recipes.
By experimenting with different seasonings and serving methods, you can enjoy the deliciousness and versatility of chickpeas in countless ways.
Recipes Using Cooked Chickpeas
Here are three delicious recipes that make use of cooked chickpeas:
Hummus Recipe
Ingredients:
- 1 1/2 cups cooked chickpeas
- 1/4 cup tahini
- 1/4 cup of lemon juice
- 2 cloves garlic, minced
- 2 tablespoons of olive oil
- 1/2 teaspoon ground cumin
- Salt to taste
- Water (as needed for consistency)
Instructions:
- Add the cooked chickpeas, tahini, lemon juice, minced garlic, olive oil, ground cumin, and a little salt to a food processor.
- Blend until it’s smooth, stopping to scrape the sides as needed.
- If the hummus is significantly thicker than you would like it to be, gradually add water, one tablespoon at a time, until you reach the consistency you want.
- Give it a taste and make any necessary adjustments to the seasoning, maybe adding more salt or lemon juice if you so desire.
- Place the hummus in a bowl that is suitable for serving, drizzle it with olive oil, and then garnish it with a pinch of paprika or cumin.
- Serve with pita bread, crackers, or fresh vegetables for dipping.
Chickpea Curry Recipe
Ingredients:
- 2 cups cooked chickpeas
- 1 onion, diced
- 2 cloves garlic, minced
- 1-inch piece of ginger, grated
- 1 can (14 oz) diced tomatoes
- 1 can (14 oz) of coconut milk
- 2 tablespoons of curry powder
- To taste, add salt and pepper.
- Fresh cilantro for garnish
- Cooked rice or naan for serving
Instructions:
- Heat the oil in a large pan or skillet over medium-low heat. Put in the diced onion and cook for about 5 minutes, until it gets soft.
- Add the grated ginger and minced garlic, then cook for an additional two minutes until the aroma releases.
- Add the coconut milk, curry powder, and diced tomatoes with their juices. Bring it to a slow boil.
- Put the cooked chickpeas back into the pan and simmer for 10 to 15 minutes, until the curry has thickened a bit and the flavors have mixed.
- To taste, season with salt and pepper.
- Serve the chickpea curry hot, garnished with fresh cilantro, alongside cooked rice or naan bread.
Roasted Chickpeas Recipe
Ingredients:
2 cups cooked chickpeas, drained and rinsed
2 tablespoons of olive oil
1 teaspoon ground cumin
1 teaspoon smoked paprika
1/2 teaspoon garlic powder
To taste, add salt and pepper.
Instructions:
- Preheat your oven to 400°F (200°C).
- In a large bowl, toss the cooked chickpeas with olive oil, ground cumin, smoked paprika, garlic powder, salt, and pepper until evenly coated.
- Line a baking sheet with parchment paper, and spread the seasoned chickpeas in a single layer.
- Roast in the preheated oven for 20–25 minutes, stirring halfway through, until the chickpeas are golden brown and crispy.
- After taking it out of the oven, allow it to be slightly cooled before serving.
- Enjoy roasted chickpeas as a crunchy snack or as a topping for salads and soups.
Health Benefits of Chickpeas
Chickpeas are not only delicious but also packed with nutrients that offer numerous health benefits:
Nutritional Value:
- Chickpeas are a rich source of plant-based protein, making them an excellent choice for vegetarians and vegans.
- They are high in dietary fiber, which promotes digestive health and helps to regulate blood sugar levels.
- Chickpeas are a good source of vitamins and minerals, including folate, iron, phosphorus, and manganese.
Health Benefits of Consuming Chickpeas Regularly:
- Heart Health: The fiber, potassium, and antioxidants in chickpeas support heart health by lowering cholesterol levels and reducing the risk of heart disease.
- Blood Sugar Control: Chickpeas have a low glycemic index, which means they are digested slowly and help to stabilize blood sugar levels, making them an excellent choice for individuals with diabetes.
- Weight Management: The combination of protein and fiber in chickpeas helps to promote satiety and reduce appetite, making them a great addition to weight loss and weight management diets.
- Digestive Health: The fiber in chickpeas supports digestive health by promoting regular bowel movements and preventing constipation.
- Bone Health: Chickpeas are a good source of calcium, magnesium, and phosphorus, which are essential minerals for bone health and may help to reduce the risk of osteoporosis.
The Final Thoughts
Chickpeas are a versatile, nutritious, and budget-friendly ingredient that deserves a place in your kitchen. With a little planning and the techniques outlined in this guide, you can unlock their culinary potential and enjoy them in countless delicious dishes. So, the next time you’re looking for a protein-packed and flavorful addition to your meals, reach for a bag of dried chickpeas and get cooking!
Please share your experiences with us, and let us know what variations you try in the comments below. Happy Cooking!
Looking for More Recipes?
This website offers a variety of delicious and easy-to-follow recipes for all occasions. Be sure to check out our other recipes for inspiration!
Read More: Salmon Crudo with Red Onion and Fried Capers